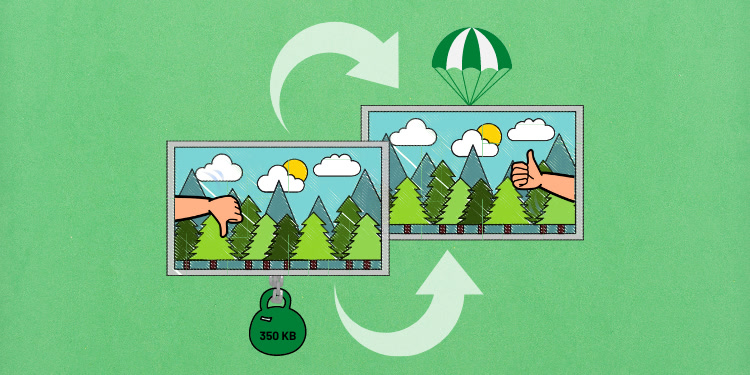
In today’s web development landscape, converting images to WebP and optimizing the performance of websites and applications is crucial. One area where significant improvements can be made is in the optimization of images. By reducing image file sizes without sacrificing quality, we can enhance the loading speed of web pages and minimize bandwidth usage.
One effective technique for achieving image optimization is converting images to the WebP format. WebP is an image format developed by Google that provides superior compression while maintaining excellent visual quality. In this article, we will explore how to convert images to WebP using PHP, specifically with the GD library.
GD: PHP’s Image Manipulation Library
GD is a powerful image manipulation library for PHP, providing a range of functions for creating, editing, and converting images. It comes bundled with most PHP installations, making it readily available for use. With GD, you can perform various image operations, including resizing, cropping, and applying filters. In our case, we’ll utilize GD to convert images to the WebP format.
To get started, ensure that GD is enabled in your PHP installation. You can verify this by checking your PHP configuration or running a simple script that checks for the GD extension like this one:
<?php
if (extension_loaded('gd') && function_exists('gd_info')) {
    echo "GD is installed.";
} else {
    echo "GD is not installed.";
}
Benefits of Using WebP Format
The WebP format offers several key benefits for web applications. One of the primary advantages is its superior compression capabilities. WebP employs advanced compression techniques, both lossy and lossless, to reduce the size of images without significant degradation in visual quality. This means that you can achieve smaller file sizes compared to formats like JPEG and PNG, resulting in faster loading times for your web pages. Smaller file sizes also translate to reduced bandwidth usage, which can be particularly beneficial for users with limited internet connections or mobile devices.
Another advantage of WebP is its support for transparency and animation. Unlike JPEG, which does not support transparency, and GIF, which has limited color support, WebP offers both transparency and a broader range of colors. This makes it a versatile choice for various types of web content, such as logos, graphics, and images with complex backgrounds. Additionally, WebP supports animation, allowing you to create engaging and interactive visual elements on your web pages without resorting to bulky GIF files.
Furthermore, WebP is gaining broader support across different web browsers. Major browsers, including Chrome, Firefox, and Microsoft Edge, have introduced native support for WebP, ensuring compatibility across various platforms. However, it’s important to note that some older or less common browsers may not fully support WebP. In such cases, it’s advisable to have fallback options in place to ensure a consistent user experience for all visitors to your website.
Converting Images to WebP with GD
Now let’s dive into the process of converting images to the WebP format using the GD library in PHP. The following code snippet outlines a function that performs the conversion:
<?php
/**
 * Convert images in a directory to WebP format and save them to another directory.
 *
 * @param string $sourceDir      The source directory containing the images.
 * @param string $destinationDir The destination directory to save the converted images.
 */
function convertImagesToWebP($sourceDir, $destinationDir) {
    // Get all files in the source directory
    $files = scandir($sourceDir);

    // Loop through each file in the source directory
    foreach ($files as $file) {
        // Check if the file is an image (you can modify the condition as needed)
        if (is_file($sourceDir . '/' . $file) && in_array(pathinfo($file, PATHINFO_EXTENSION), ['jpg', 'jpeg', 'png', 'gif'])) {
            // Create a new image from the source file
            $image = imagecreatefromstring(file_get_contents($sourceDir . '/' . $file));

            // Create a new filename with the WebP extension
            $newFilename = pathinfo($file, PATHINFO_FILENAME) . '.webp';

            // Save the image as WebP to the destination directory with 80% quality (adjust as desired)
            imagewebp($image, $destinationDir . '/' . $newFilename, 80);

            // Free up memory
            imagedestroy($image);

            echo "Converted: " . $file . "\n";
        }
    }
    echo "Conversion completed!";
}
In the above code, we define the convertImagesToWebP function, which takes the source directory and destination directory as parameters. The function scans the source directory for image files and loops through each file. It checks if the file is an image by verifying its extension (you can modify this condition to suit your needs). If the file is an image, it creates a new image resource using imagecreatefromstring and generates a new filename with the WebP extension. The image is then saved as WebP using the imagewebp function, and the memory is freed using imagedestroy. Finally, a message is displayed to indicate the conversion process.
To use this function, specify the source and destination directories and call the convertImagesToWebP function:
$sourceDir = '/path/to/source/directory';
$destinationDir = '/path/to/destination/directory';

convertImagesToWebP($sourceDir, $destinationDir);
Make sure to replace the /path/to/source/directory and /path/to/destination/directory with the appropriate paths in your environment.
Handling Conversion Errors and Exceptions
During the image conversion process, it’s important to anticipate and handle potential errors and exceptions that may arise. Several factors can lead to errors, such as invalid file formats, insufficient memory allocation, or issues with the GD extension. By implementing error handling mechanisms, you can ensure that your conversion script functions smoothly and gracefully handles any unexpected scenarios.
To handle errors and exceptions during image conversion, you can utilize PHP’s error-handling functions and techniques. For example, you can use the try-catch block to catch specific exceptions and perform appropriate error-handling actions. Within the catch block, you can log the error details, display user-friendly error messages, or gracefully terminate the script execution.
Here’s a simplified example demonstrating how to handle errors during image conversion:
try {
    // Image conversion code
} catch (Exception $e) {
    // Log the error
    error_log('Image conversion error: ' . $e->getMessage());

    // Display user-friendly error message
    echo 'An error occurred during image conversion. Please try again later.';

    // Optionally, terminate the script execution
    exit();
}
In the example above, the code within the try block represents the image conversion process. If an exception occurs during this process, it will be caught in the catch block, where you can perform appropriate error-handling actions. Logging the error details allows you to review and troubleshoot the issue while displaying a user-friendly error message informing the users about the encountered problem.
It’s important to implement robust error-handling mechanisms to ensure that your image conversion script operates smoothly, even in the face of unexpected errors. By handling errors gracefully, you can provide a better user experience and facilitate easier troubleshooting and maintenance of your web application.
Batch Conversion and Performance Considerations
In scenarios where you need to convert a large number of images or frequently update your image collection, optimizing the conversion process becomes crucial. Efficient batch conversion and considerations for performance can help minimize the processing time and resource usage involved in image conversions.
One approach to optimize batch conversion is by leveraging parallel processing. Rather than converting images sequentially, you can distribute the workload across multiple processes or threads to perform conversions concurrently. This can significantly reduce the overall processing time, especially when dealing with a large number of images. However, it’s important to ensure that your server infrastructure can support concurrent processing and that you set appropriate limits to prevent overloading system resources.
Caching can also play a significant role in optimizing batch image conversion. If you frequently convert images with the same parameters, you can cache the converted WebP images to avoid redundant conversions. By storing the converted images in a cache directory or utilizing a caching mechanism like Memcached or Redis, you can retrieve the already converted images instead of performing the conversion process again. This approach helps minimize resource usage and improves the overall performance of your image conversion workflow.
Furthermore, it’s essential to consider the server’s memory allocation and processing power when dealing with batch image conversions. Image manipulation and conversion can be memory-intensive operations, so ensure that your server has sufficient memory allocated to handle the anticipated workload. Additionally, if possible, utilize a server with a higher processing power or consider optimizing the conversion algorithm to minimize resource consumption.
By optimizing batch conversion processes and considering performance-related factors, you can ensure efficient processing of large image collections and minimize the impact on your server’s resources. These considerations are especially important when dealing with frequent image updates or when converting images on-the-fly in real time.
Alternative Image Conversion Libraries
While GD is a popular choice for image manipulation and conversion in PHP, there are alternative libraries available that offer additional features and capabilities. These libraries can provide extended functionalities for image processing and may better suit specific requirements or preferences.
One such library is ImageMagick, which is a robust and comprehensive image manipulation toolset. ImageMagick offers a wide range of features, including advanced image conversion options, support for various image formats (including WebP), and powerful image editing capabilities. It provides a command-line interface as well as PHP bindings, allowing seamless integration within your web application.
Another notable library is Intervention Image, which provides a simpler and more user-friendly API for image manipulation tasks. It simplifies common image operations, including conversion to various formats like WebP. Intervention Image abstracts the underlying GD or ImageMagick library, making it easy to switch between them depending on your needs.
By exploring alternative image conversion libraries, you can gain access to additional features and flexibility in handling image conversions. These libraries often have extensive documentation and community support, providing resources to help you get started and utilize their capabilities effectively. Depending on your specific requirements, these libraries may offer solutions beyond what GD provides, enabling you to achieve more complex image processing tasks within your PHP web application.
Using WebP Images on a Website
After successfully converting your images to the WebP format, you’ll need to incorporate them into your website to take advantage of their benefits. Here’s a step-by-step guide on how to use WebP images on a website:
- Implement Conditional Loading: You can implement conditional loading to serve the appropriate image format. Use the <picture> element or <img> element with the srcset attribute to specify multiple image sources, including both WebP and fallback formats like JPEG or PNG. The browser will automatically select the most suitable image format based on its capabilities.
- Generate Image Sources: When defining the image sources, provide the URL of the WebP image as the first source and the URLs of fallback formats as subsequent sources. For example:
<picture>
  <source srcset="https://d398j6qs7ssf4p.cloudfront.net/image.webp" type="image/webp">
  <source srcset="https://d398j6qs7ssf4p.cloudfront.net/image.jpg" type="image/jpeg">
  <img src="image.jpg" alt="Description of the image">
</picture>
In the above code snippet, the browser checks for WebP support. If supported, it loads the image.webp file. Otherwise, it falls back to loading the image.jpg file as a JPEG.
- Compression and Optimization: While WebP already offers excellent compression, you can further optimize your WebP images for web usage. Use image compression tools or libraries to reduce the file size without compromising visual quality. Additionally, leverage caching mechanisms to store and serve the converted WebP images efficiently, minimizing the need for repeated conversions.
- Testing and Compatibility: Test your website across different browsers and devices to ensure proper rendering of the WebP images and fallback formats. Use browser developer tools and online testing services to validate the image loading behavior and confirm compatibility across various environments.
By following these steps, you can seamlessly integrate WebP images into your website and provide optimized visual content to users. WebP’s smaller file sizes and support for advanced features make it an excellent choice for enhancing the performance and user experience of your web pages.
Conclusion
Converting images to the WebP format and utilizing them on your website can bring significant benefits in terms of performance, bandwidth usage, and user experience. In this article, we explored how to convert images to WebP using PHP and the GD library, providing a step-by-step guide to implement the conversion process.
We discussed the advantages of WebP, including its superior compression, transparency support, and animation capabilities. By converting images to WebP, you can significantly reduce file sizes without compromising image quality, resulting in faster loading times and reduced bandwidth consumption.
Furthermore, we covered how to incorporate WebP images into your website. By implementing conditional loading using the <picture> element or <img> element with the srcset attribute, you can serve WebP images to compatible browsers while providing fallback options for unsupported browsers. This ensures optimal image delivery and a seamless user experience across different platforms.
Additionally, we touched upon the importance of compressing and optimizing WebP images further, as well as leveraging caching mechanisms to improve performance and reduce resource usage. Testing and ensuring compatibility across various browsers and devices is crucial to guarantee proper rendering and functionality of WebP images.
Lastly, we introduced alternative image conversion libraries like ImageMagick and Intervention Image, which offer extended functionalities and flexibility for image processing tasks beyond what GD provides.
By following the guidelines and techniques outlined in this article, you can effectively convert images to the WebP format, seamlessly integrate them into your website, and unlock the benefits of faster loading times, reduced bandwidth usage, and improved user experience.
Stay up to date with the latest advancements in image compression and optimization techniques to continually enhance the performance of your web application. Embrace the power of WebP and PHP to optimize your web images and provide a visually engaging and efficient web experience for your users.


