


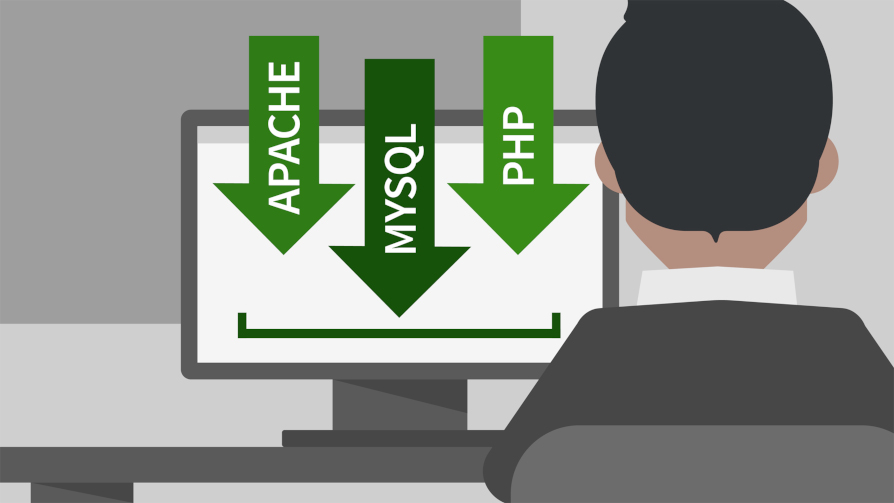
Today we are going to be installing Apache, PHP 8, and MySQL on Linux Mint. As a developer, having a local development environment is crucial for building and testing web applications. This guide will walk you through the installation process of three essential tools needed for web development: Apache, PHP 8, and MySQL.
Apache is one of the most popular web servers used to serve web content over the internet. PHP 8 is the latest version of the popular scripting language used to develop dynamic web applications, while MySQL is a powerful open-source relational database management system used for storing and retrieving data.
Linux Mint is a user-friendly and stable Linux distribution that is widely used by developers and programmers. By installing these tools on your Linux Mint system, you can have a fully functional development environment, allowing you to build and test web applications efficiently.
In this guide, I will provide step-by-step instructions on how to install and configure Apache, PHP 8, and MySQL on Linux Mint, so you can start building and deploying your web applications.
Step 1: Install Apache
Apache is an open-source web server software that is widely used by developers to serve web content over the internet. It is fast, reliable, and can run on multiple platforms, including Linux, Windows, and macOS. Apache is the most popular web server software in the world, and it is a crucial tool for any web developer.
To install Apache on Linux Mint, you can use the package manager, which is a tool used for installing, removing, and managing software packages. In this step, we will use the apt package manager to install Apache.
Open the terminal by pressing the Ctrl+Alt+T keys on your keyboard or by searching for “terminal” in the applications menu.
Update your system’s package list by running the following command in your terminal:
$ sudo apt updateOnce the update process is complete, install Apache by running the following command:
$ sudo apt install apache2After the installation process is complete, you can check the status of Apache by running the following command:
$ sudo systemctl status apache2The output of this command will show you whether Apache is running or not. If it is running, you should see a message that says “Active (running)”.
Congratulations! You have successfully installed Apache on your Linux Mint system. In the next step, we will install PHP 8, a programming language used for web development.
Step 2: Install PHP 8
PHP 8 is the latest version of the popular programming language used for web development. It is fast, secure, and easy to learn, making it a popular choice for building dynamic web applications. In this step, we will install PHP 8 on Linux Mint.
Open the terminal by pressing the Ctrl+Alt+T keys on your keyboard or by searching for “terminal” in the applications menu.
Update your system’s package list by running the following command in your terminal:
$ sudo apt updateOnce the update process is complete, install PHP 8 by running the following command:
$ sudo apt install php8.1After the installation process is complete, you can check the version of PHP installed on your system by running the following command:
$ php -vThe output of this command will show you the version of PHP installed on your system.
Congratulations! You have successfully installed PHP 8 on your Linux Mint system. In the next step, we will install MySQL, a powerful open-source relational database management system used for web applications.
Step 3: Install MySQL
MySQL is a powerful open-source relational database management system used for storing and retrieving data in web applications. It is widely used by developers to build and maintain databases for their web applications. In this step, we will install MySQL on Linux Mint.
Open the terminal by pressing the Ctrl+Alt+T keys on your keyboard or by searching for “terminal” in the applications menu.
Update your system’s package list by running the following command in your terminal:
$ sudo apt updateOnce the update process is complete, install MySQL by running the following command:
$ sudo apt install mysql-serverDuring the installation process, you will be prompted to set a password for the MySQL root user. Enter a secure password and remember it, as you will need it to access the MySQL server.
After the installation process is complete, you can check the status of MySQL by running the following command:
$ sudo systemctl status mysqlThe output of this command will show you whether MySQL is running or not. If it is running, you should see a message that says “Active (running)”.
Congratulations! You have successfully installed MySQL on your Linux Mint system. In the next step, we will configure PHP to work with Apache and MySQL.
Step 4: Configure PHP and MySQL
Now that we have installed Apache, PHP 8, and MySQL on our Linux Mint system, we need to configure PHP to work with Apache and MySQL. This step is important, as it allows us to use PHP to connect to our MySQL database and retrieve data.
Open the terminal by pressing the Ctrl+Alt+T keys on your keyboard or by searching for “terminal” in the applications menu.
Install the PHP MySQL extension by running the following command:
$ sudo apt install php8.1-mysqlThis extension allows PHP to communicate with MySQL.
Restart the Apache web server by running the following command:
$ sudo systemctl restart apache2This command is necessary for Apache to recognize the newly installed PHP MySQL extension.
To test if PHP is configured to work with MySQL, create a new PHP file by running the following command in your terminal:
$ sudo nano /var/www/html/test.phpThis command will open a new file in the Nano text editor. Add the following code to the file:
<?php
// Test PHP MySQL connection
$servername = "localhost";
$username = "root";
$password = "your_password_here";

// Create connection
$conn = new mysqli($servername, $username, $password);

// Check connection
if ($conn->connect_error) {
    die("Connection failed: " . $conn->connect_error);
}
echo "Connected successfully";
?>
Replace “your_password_here” with the password you set for the MySQL root user during installation.
Save the file by pressing Ctrl+X, then Y, and then Enter.
To test the PHP MySQL connection, open a web browser and navigate to “http://localhost/test.php“. You should see the message “Connected successfully” displayed in your browser.
Congratulations! You have successfully configured PHP and MySQL to work with Apache on your Linux Mint system. You can now start building and testing web applications on your local development environment.
Step 5: Install and Setup phpMyAdmin
phpMyAdmin is a free and open-source tool that provides a web-based interface for managing MySQL databases. It allows you to easily create, modify, and delete databases and tables, as well as manage users and permissions. In this step, we will show you how to install and set up phpMyAdmin on your Linux Mint system.
Open the terminal by pressing the Ctrl+Alt+T keys on your keyboard or by searching for “terminal” in the applications menu.
Install phpMyAdmin by running the following command:
$ sudo apt-get install phpmyadminNext, you will be prompted to configure the database for phpMyAdmin, select “Yes” to use dbconfig-common.
Enter the password that you set for the MySQL root user during the MySQL installation process.
You will now be prompted to create a password for phpMyAdmin. Choose a strong password and press Enter.
Confirm the password by re-entering it and pressing Enter.
phpMyAdmin is now installed and configured on your Linux Mint system.
Restart Apache for the changes to take effect by running the following command:
$ sudo systemctl restart apache2Open your web browser and go to http://localhost/phpmyadmin. You should see the phpMyAdmin login page.
Enter the username as “root” and the password that you set during the phpMyAdmin installation process.
Congratulations! You have successfully installed and set up phpMyAdmin on your Linux Mint system. You can now use phpMyAdmin to manage your MySQL databases through a web-based interface.
Step 6: Test your installation
After installing Apache, PHP 8, and MySQL on your Linux Mint system and configuring them to work together, it is important to test your installation to ensure that everything is working properly. In this step, we will create a simple PHP script to test our installation.
Open the terminal by pressing the Ctrl+Alt+T keys on your keyboard or by searching for “terminal” in the applications menu.
Navigate to the Apache document root directory by running the following command:
$ cd /var/www/htmlCreate a new PHP file called “test.php” by running the following command:
$ sudo nano test.phpAdd the following code to the “test.php” file:
<?php
// Test PHP and MySQL installation
phpinfo();
?>
This code will display the PHP information page, which will show you information about your PHP installation and configuration.
Save the file by pressing Ctrl+X, then Y, and then Enter.
To test your installation, open a web browser and navigate to “http://localhost/test.php“. You should see a page that displays information about your PHP installation and configuration.
Congratulations! You have successfully installed Apache, PHP 8, and MySQL on your Linux Mint system and tested your installation. You are now ready to start building and testing web applications on your local development environment.
Step 7: Granting User Permissions to Apache Web Directory
By default, the Apache web server is installed with its web directory owned by the root user, which means that a regular user account cannot write or modify files within the directory. In order to allow a regular user to modify files within the Apache web directory, we need to grant the appropriate permissions. In this step, we will add the current user to the Apache web directory with the correct permissions.
Open the terminal by pressing the Ctrl+Alt+T keys on your keyboard or by searching for “terminal” in the applications menu.
Check the ownership of the Apache web directory by running the following command:
$ ls -l /var/www/htmlThis command will show you the owner and group of the Apache web directory. By default, it is owned by the root user.
Add the current user to the Apache group by running the following command:
$ sudo usermod -a -G www-data $USERThis command adds the current user to the Apache group, which is necessary for the user to have write access to the web directory.
Change the ownership of the Apache web directory to the Apache group by running the following command:
$ sudo chown -R www-data:www-data /var/www/htmlThis command changes the ownership of the web directory to the Apache group, which allows the group to have write access to the directory.
Change the permissions of the Apache web directory to allow the Apache group to write to the directory by running the following command:
$ sudo chmod -R 775 /var/www/htmlThis command sets the permission of the web directory to 775, which allows the owner and group to read, write, and execute files within the directory.
To verify that the permissions have been set correctly, create a new file in the Apache web directory by running the following command:
$ nano /var/www/html/test.txtAdd some text to the file and save it by pressing Ctrl+X, then Y, and then Enter.
Check that the file was created with the correct permissions by running the following command:
$ ls -l /var/www/html/test.txtThe output of this command should show that the file is owned by the Apache group and that the group has write permissions.
Congratulations! You have successfully added the current user to the Apache web directory with the correct permissions. You can now modify and create files within the web directory without needing root privileges.
Conclusion
In conclusion, installing Apache, PHP 8, and MySQL on Linux Mint is a straightforward process that can be accomplished with a few simple steps. Once you have completed the installation process, you can begin building and testing web applications on your local development environment.
In this article, I have covered the steps needed to install Apache, PHP 8, and MySQL on Linux Mint, and I have also shown you how to configure PHP and MySQL to work together. Additionally, I have demonstrated how to test your installation and how to grant the appropriate permissions to a regular user so that they can modify files within the Apache web directory.
It is worth noting that while the installation process is relatively easy, it is important to ensure that your server is properly secured before deploying your applications to a production environment. This includes configuring your firewall, using secure passwords, and keeping your software up to date.
Overall, by following the steps outlined in this article, you should be able to easily install and configure Apache, PHP 8, and MySQL on your Linux Mint system, allowing you to develop and test web applications on your local machine. With this local development environment, you can experiment with new technologies and workflows without the risk of affecting your production environment.


